How to improve flicking aim?
What is flicking aim?
A flick is a very quick movement that you do with the mouse to move your crosshair in shooter games towards an enemy or a target that appeared on your field of view.
The main objective of performing a flick shot is to minimize the impact of enemy movement on your aim and to allow you to acquire your targets quickly.
The purpose of executing a flick shot is to move your crosshair quickly enough to be able to shoot the enemies, leaving them no time to change their position or take cover behind something on the map.
If executed correctly, this aim technique will allow you to deal the maximum amount of damage within the window of opportunity you're given.
With the correct sensitivity settings applied and the right amount of practice, the flicks will turn into a secret trick up your sleeve and enhance your gameplay significantly!
Flick Training
In flicking you have two subskills to train: speed and accuracy.
Here it’s important to know that you should always start out with accuracy as it’s crucial that you first become accurate before you start ramping up your speed.
Flicking accuracy
Accuracy flicking is about trying to optimize your accuracy. Not just the way the levels are designed, but also how you approach them. This means that you should be looking to prioritize being on target (target verification) over going fast. Almost all accuracy levels have something called “accuracy correction” which means that your score will get lowered if you miss a target.
To make sure you train target verification, there are a couple of things you should be paying attention to every time you start up a training level:
- Make sure your crosshair is on target before you pull the trigger:
This means, very simply, that you should start out by playing very slowly and gradually bump up your speed to the point where you start missing targets.
Once you reach that threshold, it’s time to stay right below it until you find yourself going faster automatically or being capable of bumping up the speed without missing targets consistently.
- Limit over- and undershooting:
Simply put, when moving towards a target, make sure to practice moving and stopping in one fluent motion. In other words, don’t flick fast and then correct your aim to be on target, but rather practice being on target in one fluent (and perhaps slow) move. Correcting aim is a bad habit.
Flicking speed
Speed flicking is, as the name already suggests, all about going as fast as possible. Just like all the other subskills, it’s about how you approach these levels that will make all the difference in how well you train yourself. Speed flicking is about intuition and muscle memory.
Finding a rhythm to which you can shoot targets rapidly. Unlike accuracy flicking, you won’t find a lot of levels that have accuracy correction, but rather they are kill based.
Meaning that you can really go all-out in the speed department. Things to pay attention to when training speed flicking:
- Shoot first, ask questions later:

This means that when trying to shoot a target, avoid verifying your crosshair on the target. Rather intuitively flick and pull the trigger. You want your muscle memory to guide you here.
To make an analogy here, try to look at it like you are wearing a blindfold that prevents you from clearly seeing your crosshair yet you want to break your own speed record over and over again.
- Find the perfect flow:
It will help you a lot if you try to find a certain flow or rhythm to which you can go from one target to the next. Some players use music to do this, but even if you don’t, music provides a good analogy:
Look at finding the perfect flow like finding your favorite BPM. If the flow is too fast you’ll miss a lot of targets, if it’s right on the money you’ll ace every level. Of course, going faster and faster over time is the end goal here.
How do the four types of flicking levels work?
Now that we understand what to pay attention to when training the different subskills of flicking, it’s time to figure out and see how all the training levels actually work.
3D Aim Trainer conveniently made different iterations of the same levels. This with slight variations in target size, amount, vertical/horizontal variety and also sometimes move speed. Each will train the same subskill in a slightly different way that you will be able to apply to different interactions in your main game.
Remember at all times the way you should practice these levels in terms of things you should pay attention to, as in Flicking we see four types of levels throughout Speed and Accuracy.
Let’s take a look at the four different types of Flicking training levels:
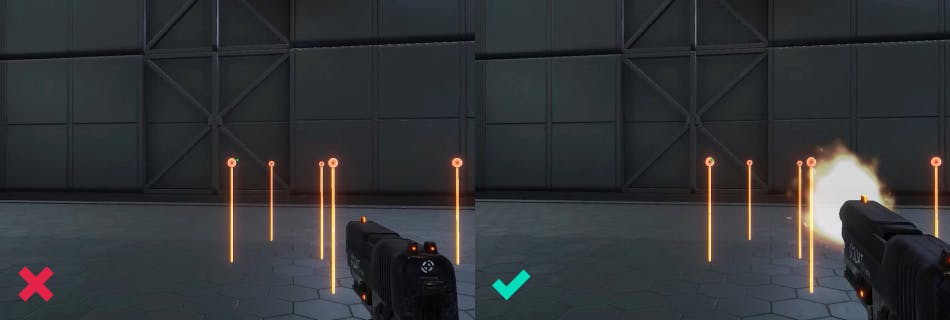
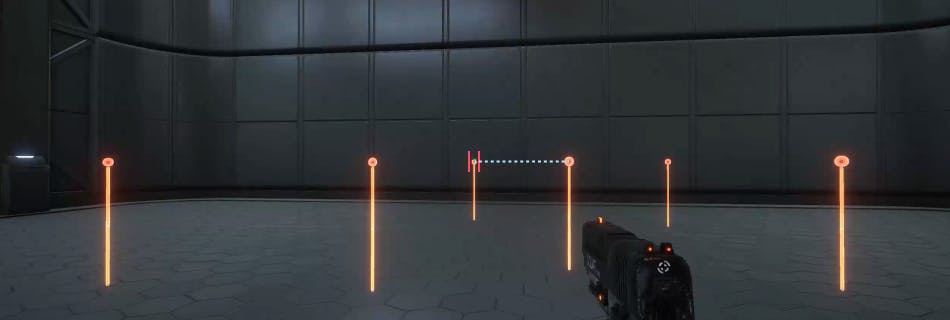
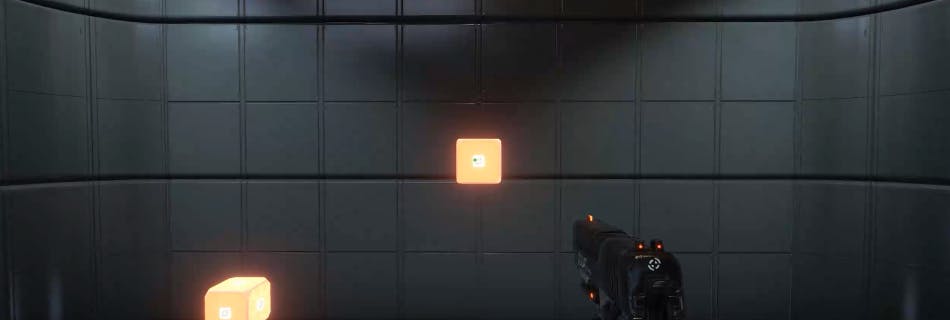
Grids
Noticeable Grid levels:
Grid levels are the most basic levels you’ll find in the Academy. Basically all targets spawn on a fixed grid which are either horizontally or vertically in 90° angle from each other. This makes the spawns more predictable, but more importantly, you will be able to practice the same distances over and over again.
1. Speed Basic Level 2
30T Grid is a level that’s perfect for switching gears in terms of speed. Because of the large amount of targets you will see groups of targets form that allow you to ramp up your speed. Once that group is taken down, you will have to lower your speed again to match that of your flow.
2. Accuracy Basic Level 2
5 tiles – cube 180 is a grid level that will force you to practice very wide angles, horizontally and vertically. The cubes spawn in a 180° field in front of you and also make a sound when they spawn. This will practice wide flicks and directional hearing. Just like most accuracy levels, this one has accuracy correction on its scoring system, so make sure you verify your crosshair on target first.
3. Accuracy Intermediate Level 2
6T Small-Wall is the quintessential accuracy grid level. The targets spawned are always in sight and are very small, thus you will have to verify your crosshair on the target continuously over the course of the level.
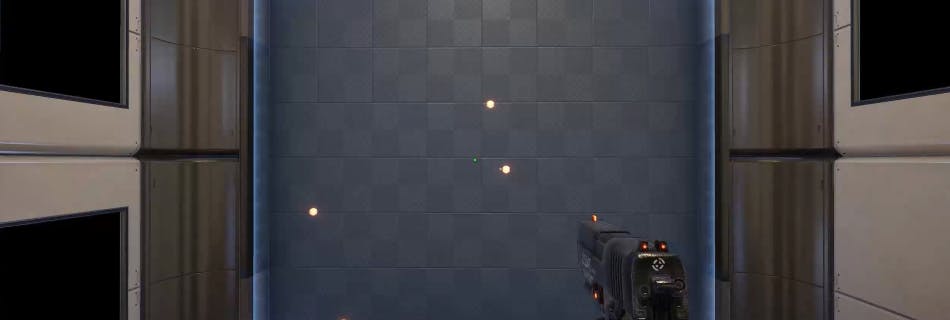
Reflex
Noticable Reflex Levels
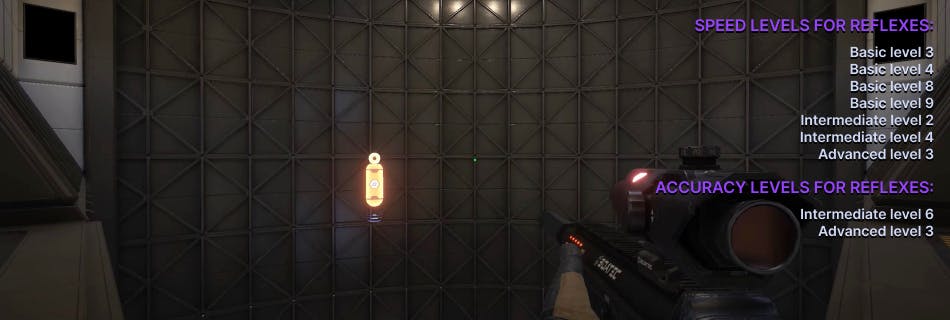
Reflex levels are all about reaction speed and a great way to measure and train your current flicking accuracy. All the levels revolve around single targets spawning where the aim is to shoot them as fast as possible. Some of these levels will allow you to reset your crosshair to center position, while others don’t give you time to do this and force you to flick from one end to another.
1. Speed Basic Level 4
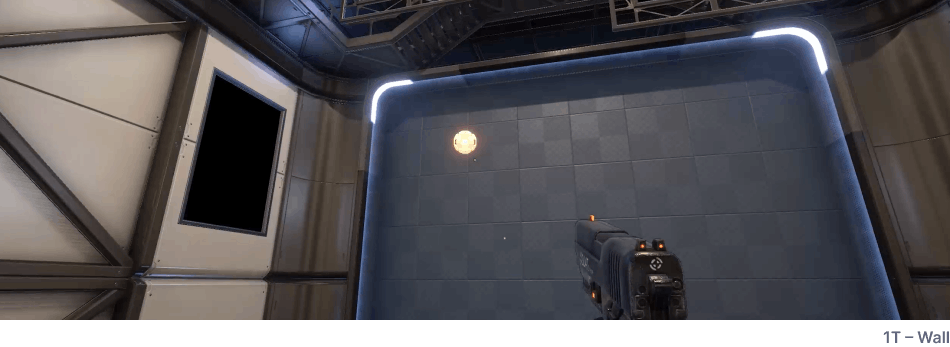
1T – Wall is a reflex level that never gives you time to reset your crosshair. This will force you to make larger flicks in terms of distance, but also increases the speed at which you will have to adjust from one target to the next. As a speed level it’s important to let your muscle memory take over here and try to limit your verification time as much as possible.
2. Speed Intermediate Level 4
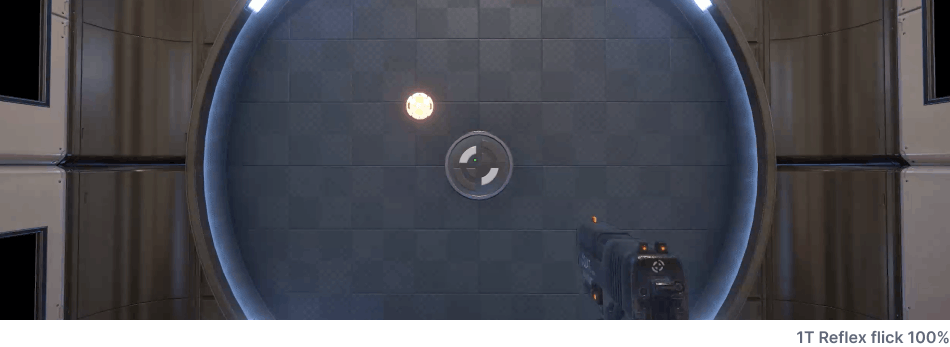
1T Reflex flick 100% - Wall is again a reflex level with a bit of a twist. The targets are moving quite rapidly and you have a limited amount of time to actually shoot them. It’s unsurprisingly a speed level because of it. Again speed over verifying is required to train it correctly.
3. Accuracy Advanced Level 3
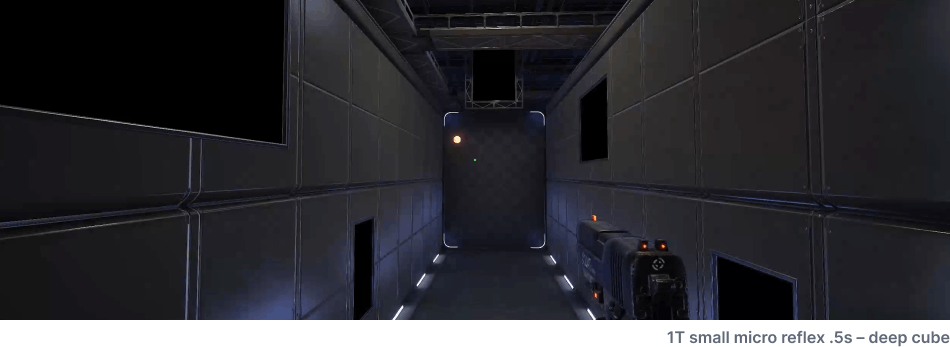
1T small micro reflex .5s – deep cube is an accuracy level designed to make you verify your target at the highest speeds possible. As this is an advanced level, prepare yourself to have a hard time. Targets are small, so you’ll need very accurate flicking to pull this one off. As the name suggests, you have .5 seconds time to make it to the target.
Burst
Noticeable Burst Levels
Burst levels are great for practicing taking down multiple targets fast. These levels are all designed with speed in mind and they will train pathing and target prioritizing on top of it. Last but not least, learning how to burst fast will help out greatly in lots of other flicking levels. E.g. on grid levels you can change from flow to burst speed and back again. Netting you the best results, just like in your main game.
1. Speed Intermediate Level 5
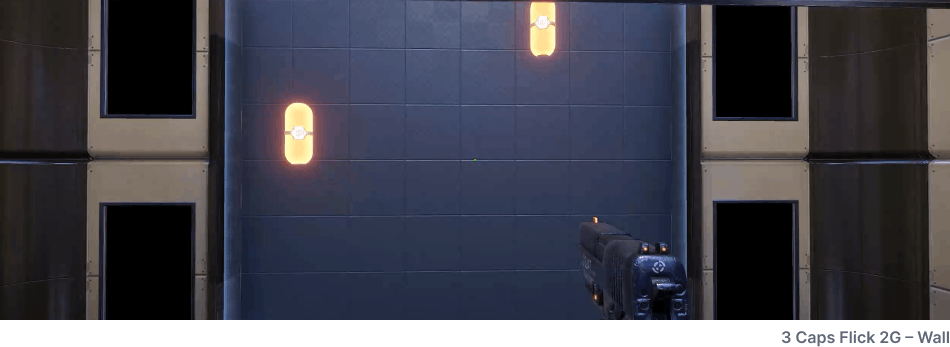
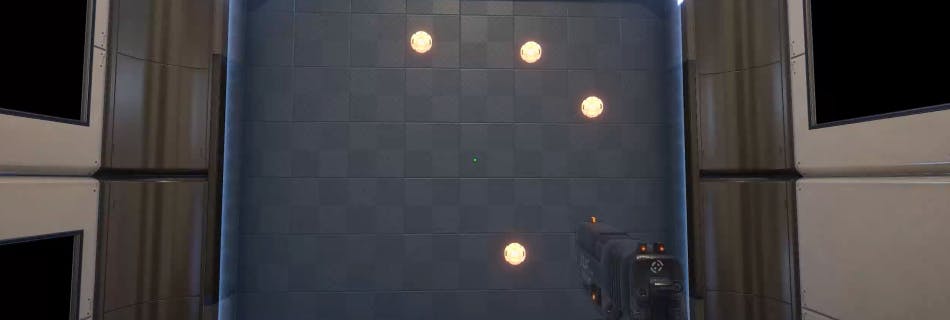
3 Caps Flick 2G – Wall is a reflex level where target prioritization and pathing are super important. Not only will you have to flick fast, but understanding which targets to shoot first and in what order is mandatory to ace it. The advanced version of this is very challenging.
2. Speed Intermediate Level 6
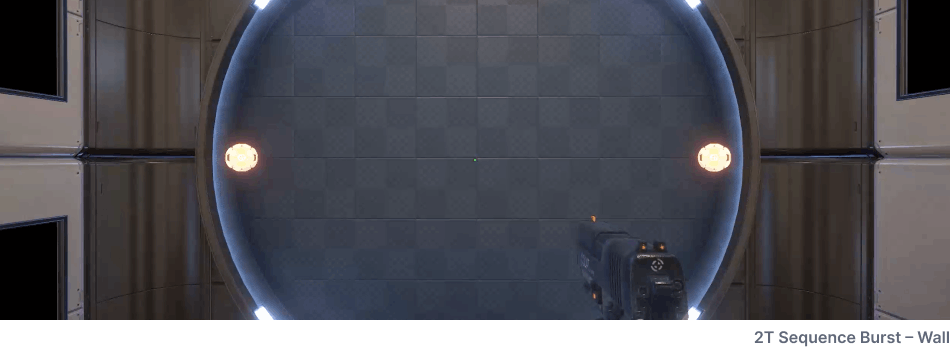
2T Sequence Burst – Wall is another burst level that’s a little bit different. The targets will always spawn at the same distance from each other. First further apart and then closer together. This will give you an immense variety of flick distances to work with. Spawns are very predictable though, so you can and should focus on going fast.
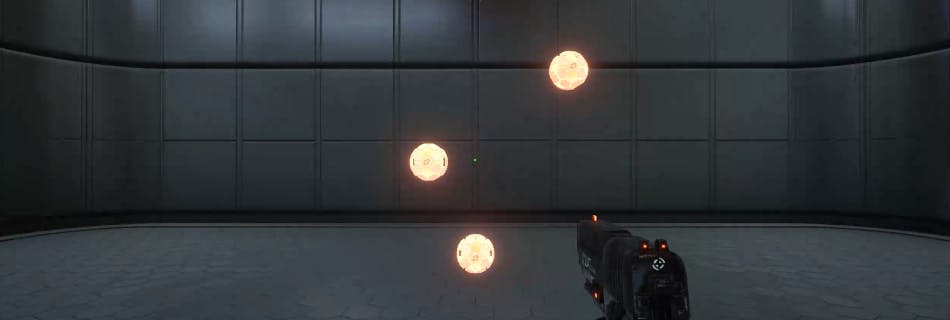
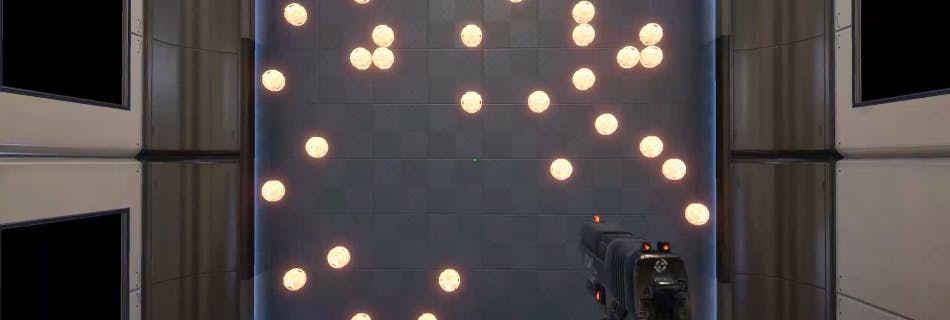
All Angles
All Angles is the category of levels that spawns targets all over the place, unlike grids. This means that the spawns are unpredictable and the variety of flicking distances are endless. This type of levels has the most interesting levels in the Flicking department.
Noticeable All Angles levels
1. Speed Basic Level 7

5T Large - Box Wall – Endurance is a level that really rewards you for going as fast as you can. Every time you hit a target the timer adds another .2 seconds of playtime. This effectively means that if you are able to shoot targets faster than that, you will be gaining time and thus prolonging your training time on this level. That is ultimately the goal of this level, upping your speed to that amount.
2. Speed Advanced Level 1
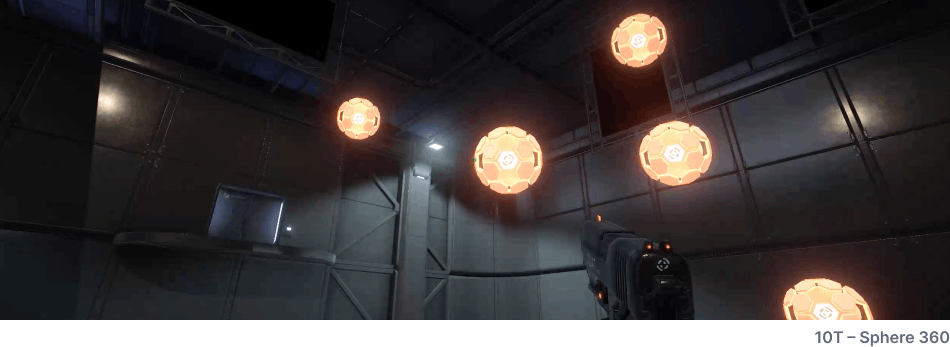
10T – Sphere 360 is an advanced all angles level that trains you in every way possible when it comes to flicking. Vertical and horizontal alignments, pathing, speed, .. all in a 360° arena. Listening closely to spawn sounds will also up your ability to achieve high scores.
3. Accuracy Basic Level 5
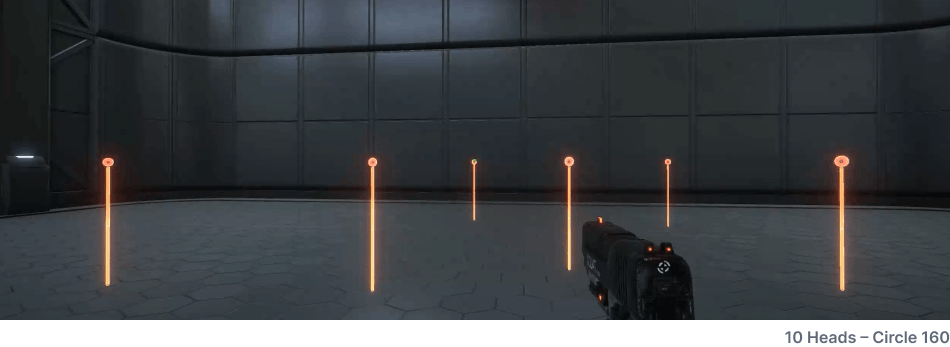
10 Heads – Circle 160 is the perfect level for practicing shooting headshots as the targets are only hittable by doing so. They also all spawn at ground level, so there’s only horizontal variation here. However, the targets themselves are pretty small. So being an accuracy level, you should verify your crosshair first before pulling the trigger.
4. Accuracy Basic Level 6
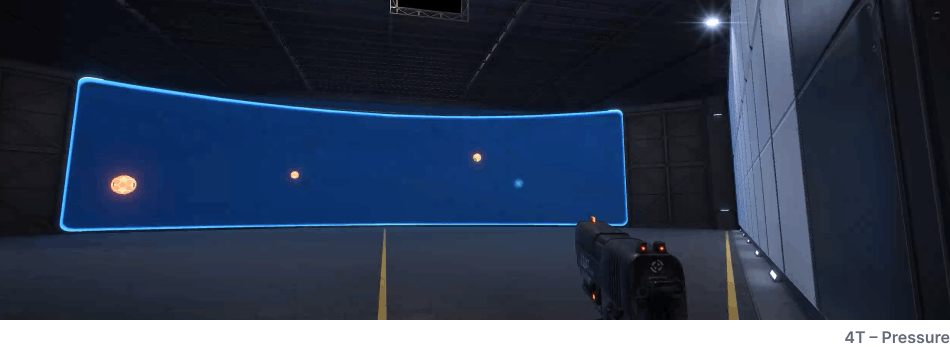
4T – Pressure is a level where all the targets move towards you in a straight line. However, because of the angle, they will actually have a trajectory that changes their horizontal and vertical alignment as they get closer to you. Target prioritization is another key to nailing this one.
The Flick Shot and In what games do you need it the most?
Flicking your aim is good for all types of FPS games. Flick shots are super useful and versatile addition to the arsenal of every good FPS player and can find application on tactical shooters, arena shooters, battle royale games, you name it. Flicking is also good for low RPM weapons like snipers and revolvers. This means that flicking while aiming down sights is an important training scenario too. Flick shots are also included in the COD Aim Training and CS2 Aim Training. Here are some of the games where you need flick shots the most:


